
How to Tie a Windsor Knot
Master the classic Full Windsor knot with this slow, mirror-view walkthrough designed to produce a symmetrical, triangular knot with a crisp center dimple every time.
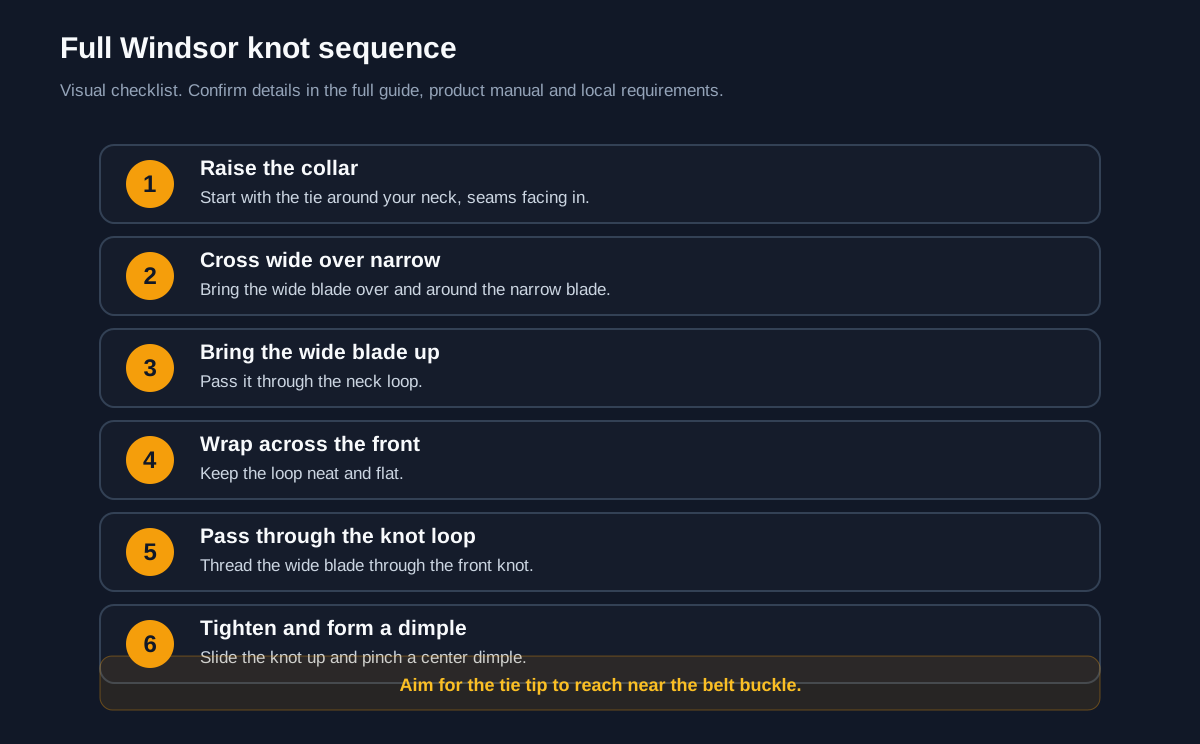
Raise the collar, cross the wide blade over the narrow blade, bring the wide blade up through the neck loop, wrap it across the front, pass it through the knot loop, then tighten slowly and pinch a center dimple.
Watch: How to Tie a Windsor Knot Step by Step
The mirrored Windsor knot sequence, from the initial cross to the final tighten and dimple. · 3:48 minute walkthrough. The full written steps are below.
Build the knot one loop at a time
A Full Windsor looks complicated because several loops overlap. Watch the location of the wide blade at each stage instead of pulling the tie tight immediately.
Before you start
- Start with the wide blade longer than the narrow blade.
- Keep the wide blade in front of the narrow blade throughout the wrap.
- Keep loops flat and untwisted.
- Form the dimple before tightening the knot fully.
Common failure points
- A twisted inner loop creates a lumpy knot.
- Tightening too early makes the loops uneven.
- The tie tip should finish near the belt line.
Watch the original demonstration
See the source video before you start, then use the step checkpoints below as your field guide.
Play source video on YouTubeKeep learning
- Tie a Half Windsor KnotA narrower, simpler alternative.
- Tie a Necktie Using the Table MethodA fast shortcut method.
- Tie a Full Windsor Step by StepCompare an alternate walkthrough.
Visual step map
See the full sequence before you start, then check off each step as you go.
0 of 7 steps checked
Materials and cost planner
Select the items you plan to buy, adjust any estimated price, and calculate the selected total.
Editable rough U.S. retail estimates. Estimated all listed: $61.00. Prices are planning estimates, not quotes — tax, store, brand, size and quantity will change them.
Time and finish planner
Estimate active working time from the number of steps in this guide.
Time block calculator
Estimate how long a sequence of tasks will take before you start.
Add transition and waiting time separately. A realistic plan usually needs more time than the active-task total.
- Read the tools, materials, safety notes, and steps below for free.
- Tap See 20-second demo if you want to understand it first.
- Tap Start Camera Coach when you want hands-free help, or Voice-only if you do not want to use the camera.
- Allow camera and microphone. Point your phone at the work; the coach watches your progress and tells you the next step.
🧰 Required Tools & Equipment
- ✓ Full-length or wall-mounted mirror
- ✓ Handheld inspection mirror
- ✓ Pair of collar stays
📦 Materials & Supplies
- ✓ Button-down dress shirt
- ✓ Standard necktie (approx. 57-60 inches)
- ✓ Tie bar or clip (optional)
⚠️ Safety Checkpoints & Warnings
- • Do not pull the neck loop excessively tight against your trachea; keep it snug against the collar band without restricting breathing.
- • Remove sharp rings or smooth rough fingernails before handling delicate silk to prevent snags and fabric runs.
📋 Step-by-Step Guide (7 Steps)
Drape the Tie and Set Starting Lengths
Flip your shirt collar up and button the top collar button. Drape the tie around your neck with the seams facing inward against your chest. Position the wide end on your right side hanging roughly 12 inches lower than the narrow end on your left side (wide tip resting near your upper thigh).
- • Wide end hangs significantly lower than the narrow end.
- • Tie lays flat against the back of the neck with no twists.
- • Leaving both ends at equal length, which results in a finished tie that is far too short.
Cross Over and Form the First Loop
Cross the wide end in front over the narrow end to form an 'X' shape near the collar button. Bring the wide end up through the neck loop from underneath, pointing it toward your chin. Pull it up completely and let it drape down to your left side, keeping tension on the narrow end.
- • The wide end hangs down on your left with its underside showing.
- • A secure anchor wrap wraps around the left side of the neck loop.
- • Pulling the wide end too loose, causing the knot base to sag.
Pass Behind and Wrap the Second Anchor
Take the wide end and pull it horizontally behind the narrow end from left to right. Once it emerges on your right side, bring the wide end up over the front of the right neck loop. Tuck it down through the neck loop toward your chest so it emerges on the right side, underside facing out.
- • Two symmetrical triangular wraps exist on both sides of the central narrow strand.
- • The back seam of the wide end faces outward on your right side.
- • Passing over the front instead of behind, which ruins knot symmetry.
Form the Horizontal Front Bridge
Bring the wide end horizontally across the front of the triangular knot from right to left. Smooth the fabric flat with your thumb and index finger to create a neat horizontal band. Do not pull this band overly tight, as you will need to thread the tie behind it in the next step.
- • A smooth, flat horizontal band spans across the knot face.
- • The finished front side of the tie fabric is facing forward again.
- • Twisting the tie so the seam shows on the front horizontal band.
Pass Up Through the Neck Loop and Down Through the Knot
Bring the wide end underneath the entire knot assembly and push it up through the neck loop from bottom to top. Guide the tip over the top of the knot and slide it directly downward through the horizontal front bridge you formed in step 4. Pull the wide end all the way through until the slack is removed.
- • The wide blade hangs directly down the center of your shirt placket.
- • The front knot displays a clean, enclosed triangle.
- • Feeding the wide end behind the entire knot instead of through the front bridge.
Cinch, Dimple, and Adjust the Knot
Pinch the sides of the wide end just below the knot with your thumb and index finger while pushing your middle finger into the center to create a clean dimple. While holding the dimple, gently pull down on the wide end to tighten the knot itself. Hold the narrow tail with one hand and slide the completed knot upward until it rests flush against your collar button.
- • A distinct, centered dimple sits directly beneath the triangular knot.
- • The knot rests snugly against the closed shirt collar without gap.
- • Skipping the dimple, resulting in a flat and unrefined knot profile.
- • Sliding the knot up by pulling the wide blade rather than the narrow tail.
Fold Collar Down and Verify Final Alignment
Fold your shirt collar neatly down over the neckband, making sure the rear tie band is fully concealed. Tuck the narrow tail into the keeper loop on the back of the wide blade. Inspect in the mirror to verify the tip of the wide blade rests precisely at the midpoint of your belt buckle.
- • Tie tip touches the center of the belt buckle.
- • No neckband fabric is visible above or around the collar wings.
- • Leaving the tie resting too high above the waistband or dangling past the belt.
Credit: inspired by an original tutorial by How to tie a tie — watch the original on YouTube.
Don’t have everything?
- No Keeper loop on tie? Tie bar or small hidden safety pin
- No Wall mirror? Front-facing smartphone camera propped at eye level
Frequently asked questions
What is the difference between a Full Windsor and Half Windsor?
A Full Windsor uses more wraps, producing a wider, more triangular knot. A Half Windsor is narrower and usually faster to tie.
Why does my Windsor knot look uneven?
Uneven loops usually come from twisting the tie or tightening too early. Keep each wrap flat and adjust the knot slowly at the end.
How long should the wide end be?
Start with the wide blade well below the narrow blade. After tightening, the tip should finish near the belt line.
What collar works best with a Windsor knot?
A wider spread or semi-spread collar gives the larger Windsor knot room to sit neatly.